Thursday, September 27, 2012

Colour Me In: Purple! - Rimmel Lasting Finish in #04

This Colour Me In series is a collection of posts where your beloved bloggers, Tram, Amanda, Tezza and myself will be posting about the selected shade from whatever we're able to gather from our beauty stash!

Purple is easily one of my favourite shades to use when applying eyeshadow (ye kno whad I mean)... But I decided to kill my streak in eyeshadow posts for this series and do a purple lipstick!

The other day, I dropped by BigW and purchased a few goods.
Those goods included this purple lippy by Rimmel's Kate Moss lippy range.
I was super excited (I couldn't wait until IMATS this weekend to get my ideal purple lippy....), so I impulse bought Rimmel's one...

I actually absolutely love the look of black lips. But it's way too dark to wear.... So a purple lippy or dark red will have to do!

 Fraid' it's not so great.... Lasting? Don't get ahead of yourself.

I couldn't wait to lather it into my lips, I opened it up waiting in line at the post office, taking pics along the way of course!
 I love their packaging!

And the signature crown on the top of course.

Smells good! I used my reverse phone camera to apply it... But stupid Alice already had pink lipstick on.... that feathered out.... so I had a kinda pink outlined purple lips walking back home... Oh well!

Home sweet home, I cleaned up my lips and reapplied the lipstick 
It's creamy, but doesn't last too long... 

I still love it though! (Until I find another purple lippy) ...but you can see that it starts to fade after an hour.... And completely vanishes after you eat..

An hour later and it's bit more faded, see how it's more pinkish?
This will definitely not last after a meal... (And it didn't.)


Why I love it:
-Pleasant scent
-Gorgeous shade
-Super moisturising

Ehhhh...
- Starts fading in less than an hour
-You have to reapply many times

My verdict:
As much as I like this shade, the effort to constantly reapply and check up on it is not worth it! It is nothing like it's sister lippy, #20. I will stick with this until I find another lippy of this shade that does a better job.

Pricing and Available at:
 $11.50 @ BigW

The usual routine, hop over to Amanda's blog for (better) purple lippies, Tez with cutie patootie Benefit Hervana blushes and Tram getting fancy with a nail and makeup look!

I think you should all click the link below too.


Attending IMATS 2012, the make-up wonderland.


Attending IMATS last year.... I was no where near prepared. From the clothes I wore to the super human strength that was required ludging around all those bags.... But this weekend, I'm pretty confident to say - I got this!

IMATS, standing for International Makeup Artist Trade Show is a wonderland for makeup frenzy beings like myself. It is an event covering two days - September 29th and 30th 2012 - where makeup artists, students and exhibitors showcase their work and products. The days are scheduled with live makeup demos along with an incredible opportunity to purchase products at a (usually) discounted price.

A few things I wish I knew last year...

  1. Check the weather. Expect bipolar weather regardless of how certain you are, wearing a short sleeved top and a skirt will not suffice
  2. Do your research. Check out the list of exhibitors, filter through out reviews and swatches, spam open those many tabs on your web browser and figure out what you want to buy! 
  3. Save, save save! Even after selling my dq ticket last year, I still only had $30 to spend. Ridiculous!
  4. Remember your camera. Take lots of pictures.... you have to! Being the forgetful Alice I am, of course I had to leave my camera at home! 
  5. Bring snacks... A lot of them. 
  6. Check out all they have to offer!  Check out the schedule for this weekend and organise your day accordingly (but I'm leaving that up to Trammie as usual hehehehehe).

Of course, I'll be attending the Sydney IMATS on the Saturday. Tickets are available here.

I hope to bump into some of you there!

Thursday, September 20, 2012

Colour Me In: Blue! Eyeshadow Tutorial

Hi!

Once again, another post from the Colour Me In series and another eyeshadow tutorial!
I actually started with wanting to use other shades (white and purple) next to the blue before.... And recorded it... And it turned out to be a disaster. With 20 minutes til' I had to leave for work, I decided to stick to shades I was more comfortable with..


Starting with my bare face of course! (I woke up at 6:30 on this morning and slapped on some make up to record a video of the progress of growing green onions! Check out my post here)

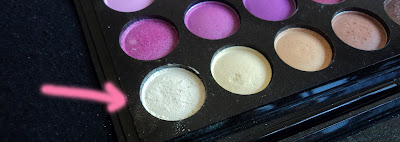
I used my trusty Manly palette for this look. Never lets me down!

Method:
 1. Prime! Of course, I used my concealer all over my lids.

2.
 With a blue shade,
 Apply to outer corners, eccentuating at the crease.

3.
With a highlight,
 apply to inner corners and use it to blend

4.
Line your eyes

Annnd done!
 Meep

But really, all these looks that I strut in all my eyeshadow posts, I would not wear out haha.... They're just super fun to create!

Check out Tram's, Tez' n' Manda's posts for more blue goodness!

Sunday, September 9, 2012

Nails: Creating a Pink to Purple Gradient

I have a feeling there will be alot of gradient effects on my nails until I've used up all the colour combinations I think would look shnazzy...


Pastel pink > Darker pink > Dark plum shade

Sitting infront of my computer getting ready to study and I realised that I have not painted my nails in two days! So I hopped on over to my drawer and pulled out my recently purchased OPI in Mod About You and  swiped away. And for an even bigger reason to procrastinate, I didn't want to have plain jane nails so I decided to gradientify it with a few extra polishes.

L>R: OPI - Mod About You, Ulta3 - Strawberry Sundae & Ulta3 - Mulberry

Method:
(Check out this post for more pics of how I do my gradient nails too!)
Mod about you! I never noticed this until I was editing this photo, but the plastic part of the nail brush has 'OPI' embossed on it! (Arrow pointing)
1. Two coats

Ulta3's Strawberry Sundae, a gorgeous pink but too kiddish on its own. 
2. Layer one - Sponge on 2/3 of the way down

3.  Layer two - Sponge 3/5 of the way down

4.  Layer three - Sponge 1/3 of the way down

I was going to leave it at this, but it was too nicki-minaj-y for me
 Ulta3's Mulberry. This is the shade I've been wearing on my toes since I purchased this nail polish (Over six months ago!)
5. Sponge lightly 1/2 of the way down, repeat until you reach the opacity you desire!

6. Clean up (Two days late of taking this pic...).. And Voila!

On my right hand I decided to skip the pink and went straight into Mulberry after two coats of Mod About You.
I like it!

Thursday, September 6, 2012

Colour Me In: Green! - Tutorial: Rainforest Inspired Eyeshadow Look

Hi cuties!

The shade for this week's Colour Me In Thursdays is green!

This 'Colour me in' series is a collaboration of your four beloved bloggers, Tez, Manda, Trammie and myself bringing you a shade from the colour spectrum each week! 

It has been a while since I've last played with eyeshadow... Since October last year.... Yikes. I'm so surprised that my eyeshadow applying skills haven't turned out that bad.

For this week's shade, green, I decided to do an eyeshadow look. I immediately thought of using the shades you think of when you think of rainforests, and I am happy with how it turned out!

I've been letting my eyebrow hairs hang loose since Uni has started... Gosh, imagine what habit I'll get into once I have kids!

 Got around to using the shades in my beloved and much neglected Manly palette


 The mirror I use to create all my looks! I haven't used this baby in so long.

By the way, I just recieved my camera battery in the mail so I'm back to using my camera... Thing is, that I haven't gotten use to the habit of using it, so half of the images below are without flash. Sorry!

Method:

1. Start with primed lids

2. Using a light lime green shade,
 Swipe over 3/4 of your lid going up

3. And with a more jade shade,
 Cover 3/4 of your lid leaving the insides (So that you can still see the lime on the inner corner of your eyes)

4. With a forest green-jade-ish shade,
 Cover your outer corners

5. With a light eyeshadow of your choice,
Blend and cover below your brows

6. With a dark blue,
 Blend into a small section of the outer corners.

7. With black, 
*then I remembered to use flash... now the pictures can be bigger!
Blend an even smaller section of the outer corners.

8. Line your eyes annnnd some finishing touches (highlighting inner corners, mascara and lipstick),

Voila!

Products used: 180 Manly Palette, LA Colors 5 palette, Daiso Liquid Liner, Australis Concealer (as primer) in Dark, Australis Blush in Flash It! Royal and Langnickel Eyeshadow brush, Ecotools Blush Brush, Gloss Eyeshadow Brush, and NYX Eyeshadow in Highlight.

-cheesles-

(Out of 148 shots taken...)The only decent images I have of me with my eyes completely open.. And I have my glasses on. Dammit.

Check out Tram's post for nail swatches on a heap of green hues, Tez for more pastel shades and Amanda creating a look with a few of her green eyeshadows.

Thanks for viewing!
Copyright © 2014 Arsyparsy