Showing posts with label Nail Art. Show all posts

Monday, August 5, 2013

Nail Art: Maroon Embellished Claws

Chipped nails are a no go, I was just about to paint these babies! I sat on my bed, sighing and looked my one chipped index nail... How can I work my way around this, not have the standard curved nail and still use one of my new polishes...

Before and after shots: It's like a new person (set of nails)!

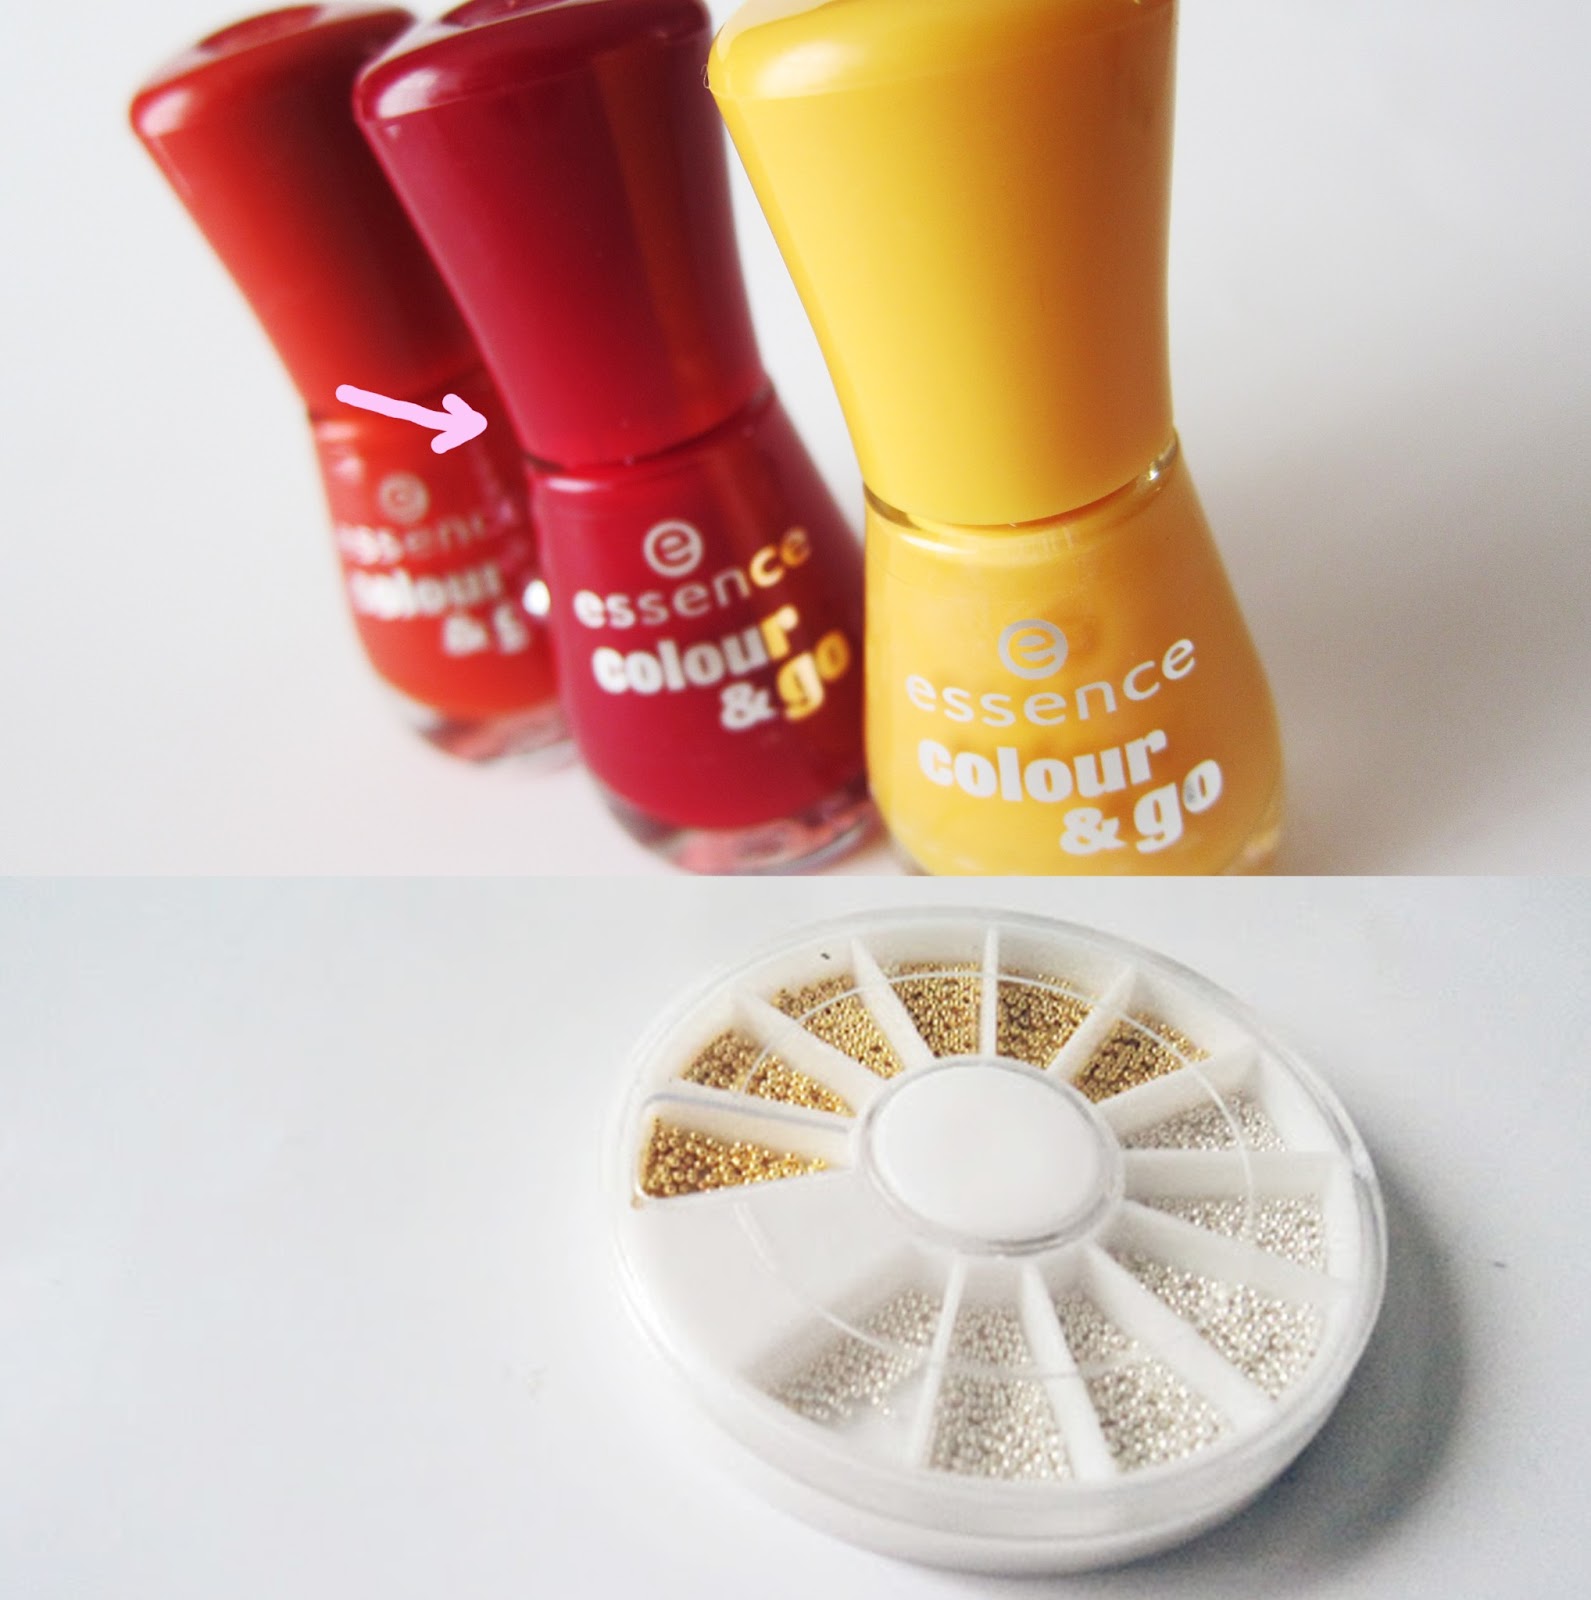
Essense came out with their new Colour and Go nail polish range and of course, I had to buy a few... 
Finally my change to try them out!

Products used:
Essence's Colour & Go 'Do you speak love?'
Microbeads off eBay!


Step 1:
I filed each one of them into a 'claw', 'v' form.
It looked pretty ugly when it was done, but I carried on and hoped for the best.

Step 2:
Painting two layers of Essence's Colour & Go 'Do you speak love?' on each nail:
Actually looks pretty cute...

Step 3:
And time to coat with a thick clear coat and embellish! 
 I went with three beads down the center from the bottom!

Voila!
It's true colour during daytime.... I love it!

I think this is the sweetest look - especially with the whole bling along the middle.
This stayed on for four days! Pretty awesome! 

Wednesday, April 17, 2013

Nail Art: Pastel & Dots with FOA


Image and video hosting by TinyPic

The difference in a nail look by just adding specks of glitter! This is an easy peasy look. Here I added orange hexagonal glitter pieces as an accent on my ring finger. I used Face of Australia's Orange You Glad You Came? and Castle in the Sky. They looked terrific all together.

My two tips. Face of Australia created such a lovely range of pastels, they look great mixed together. I'm pretty devo that the brand isn't around for me anymore, they are coming out with so many new products, I'm just admiring from afar. 

Tuesday, January 15, 2013

Nail Art: Birthday Nails for the Birthday Girl

First post for 2013. I turned 20 guys! I went on many food adventures that I spent with my favorite people.

What a better way to spend a snippet of my birthday than painting birthday nails?
I stuck to a bit of pastel and light colours.

Now without further adieu, I will show you how I did it!

Step 1:
 One strip of color half way down your nail

Step 2: The wick
With a stripper brush, a piece of hair, what ever works for ya, I dipped into my liquid liner (I know.. it worked though okay...) and made a little strip.

Step 3: The flame
Make a little tear drop thing

Step 4: Making the flame look more like a flame
 Now a yellow mini tear drop thing!

Step 5: Candy stripes 
White stripes across each little block of colour and a clear coat on top. I was admiring my nails at dinner at Chefs Gallery.

And those are my birthday nails. After my birthday week, I scraped off the flames. Hehe.

Check out my food blog if you please - Meet and Eats.


Tuesday, November 6, 2012

Nails: Tutorial - White Weaves on Rimmel's Misty Jade

Hi!

I've always thought Rim's Misty Jade as a bit dark... Looking to brighten it up with some white here and there did just the trick!


Method:
1.
Two coats of Rimmel's Misty Jade

2. 
With a white stripper brush, or whatever you have, make lines as so:

Repeat with the rest of your nails.
And voila!

Instagrammed pic^ hehe


I hope you enjoyed this short post and you all enjoy the rest of your day! 

Saturday, October 20, 2012

How to: Candy Nail Striper Nails

I've always thought Mod About You was a bit boring on my tips. I decided to shnazz it up a bit more by adding stripes. Oh the difference its made!


Method:
Two coats of Mod About You

Grabbing a nail striper brush

The process:
Start with a line in the middle, and work your way out.

 Two nails done, ding ding!

 Looking good!

Au reviour!

Sunday, September 9, 2012

Nails: Creating a Pink to Purple Gradient

I have a feeling there will be alot of gradient effects on my nails until I've used up all the colour combinations I think would look shnazzy...


Pastel pink > Darker pink > Dark plum shade

Sitting infront of my computer getting ready to study and I realised that I have not painted my nails in two days! So I hopped on over to my drawer and pulled out my recently purchased OPI in Mod About You and  swiped away. And for an even bigger reason to procrastinate, I didn't want to have plain jane nails so I decided to gradientify it with a few extra polishes.

L>R: OPI - Mod About You, Ulta3 - Strawberry Sundae & Ulta3 - Mulberry

Method:
(Check out this post for more pics of how I do my gradient nails too!)
Mod about you! I never noticed this until I was editing this photo, but the plastic part of the nail brush has 'OPI' embossed on it! (Arrow pointing)
1. Two coats

Ulta3's Strawberry Sundae, a gorgeous pink but too kiddish on its own. 
2. Layer one - Sponge on 2/3 of the way down

3.  Layer two - Sponge 3/5 of the way down

4.  Layer three - Sponge 1/3 of the way down

I was going to leave it at this, but it was too nicki-minaj-y for me
 Ulta3's Mulberry. This is the shade I've been wearing on my toes since I purchased this nail polish (Over six months ago!)
5. Sponge lightly 1/2 of the way down, repeat until you reach the opacity you desire!

6. Clean up (Two days late of taking this pic...).. And Voila!

On my right hand I decided to skip the pink and went straight into Mulberry after two coats of Mod About You.
I like it!

Thursday, August 30, 2012

Colour Me In: Yellow - Steps into Creating Sunset Gradient Nails

Happy Thursday my loves!

I woke up looking like this but was all like whatevs and went out anyway.
Thursday again and the colour we're bringing to you is yellow!
I was absolutely lost in deciding what beauty product to do.... The only thing I had was eyeshadow or nails. My big sister was 100% correct when she said that yellow does not go with our Asian complexion... Oh well.

Each week, Tez, Manda, Trammie and myself will be bringing you a new shade and a post with products from our collection featuring that shade! 

 Yelloooow! *excuse to post a picture of me in a yellow cardigan.
Sporting Rimmel's #20 by the way, don't you love it? I do!

 So the nail polishes I'll be using to create this shmancy look are Ulta3's Watermelon and Honolulu

 Starting off with bare nails of course! (I did a horrible job at washing it off from my previous mani)

 Dip!

 Two layers will do.

 Get a sponge, any sponge will do. I've even tried a sponge from snipping it from one of my dish washing sponges (there was a square of the corner missing. No questions were asked.) 
The sponge I'm using is a foundation sponge.

 Sponge 2/3rds of the way down

 Load it up again and sponge a bit less. With each layer, you will splotch on less and less going downwards.

 Third layer! See how it's blending in!

 Fourth layer!
 I was pretty satisfied with it so I swiped yellow nail polish across the tip to make a solid colour at the tips!

 And my secret weapon to make everything look that teensy bit nicer, one layer of NYX in French

 Taaa daaa!!!

For my right hand, I decided to do the opposite to see if it'd look better... (it didn't)
 Yellow yellowoowowowow

 Splotch splotch


Ta da!

And that's the end to my tutorial on creating sunset gradient nails. And of course you can use any colour combination!

This combination isn't too shnazzy... I really don't like it. But the right one, vodka sunrise anyone?

I hope you enjoyed this post!

Check out more yellow posts from your other fellow beloved bloggers! Amanda and Trammie also schnazzed up their nails and Tez, with a review of Benefit's Lemon Aid Primer!
Copyright © 2014 Arsyparsy